
If your greenhouse plants look tired despite regular watering and fertilizing, the cause might not be nutrients at all it could be your soil's pH. In a controlled greenhouse environment, where you're often working with raised beds, containers, or amended soil rather than open ground, pH problems can develop faster and go unnoticed longer than they would outdoors, simply because you're not getting the natural buffering effect of a wider soil ecosystem.
Learning how to test soil pH is one of the simplest diagnostic habits you can build into your greenhouse routine, and it doesn't require expensive lab equipment to get a useful answer. This guide walks you through how to properly sample greenhouse soil, which testing methods actually work, how accurate each one is, and what to do once you have a number.
What Soil pH Measures, and Why It Matters More Inside a Greenhouse
Soil pH is a measurement of how acidic or alkaline your soil is, on a scale that runs from 0 to 14. A reading of 7 is neutral. Anything below 7 is acidic, and anything above 7 is alkaline.
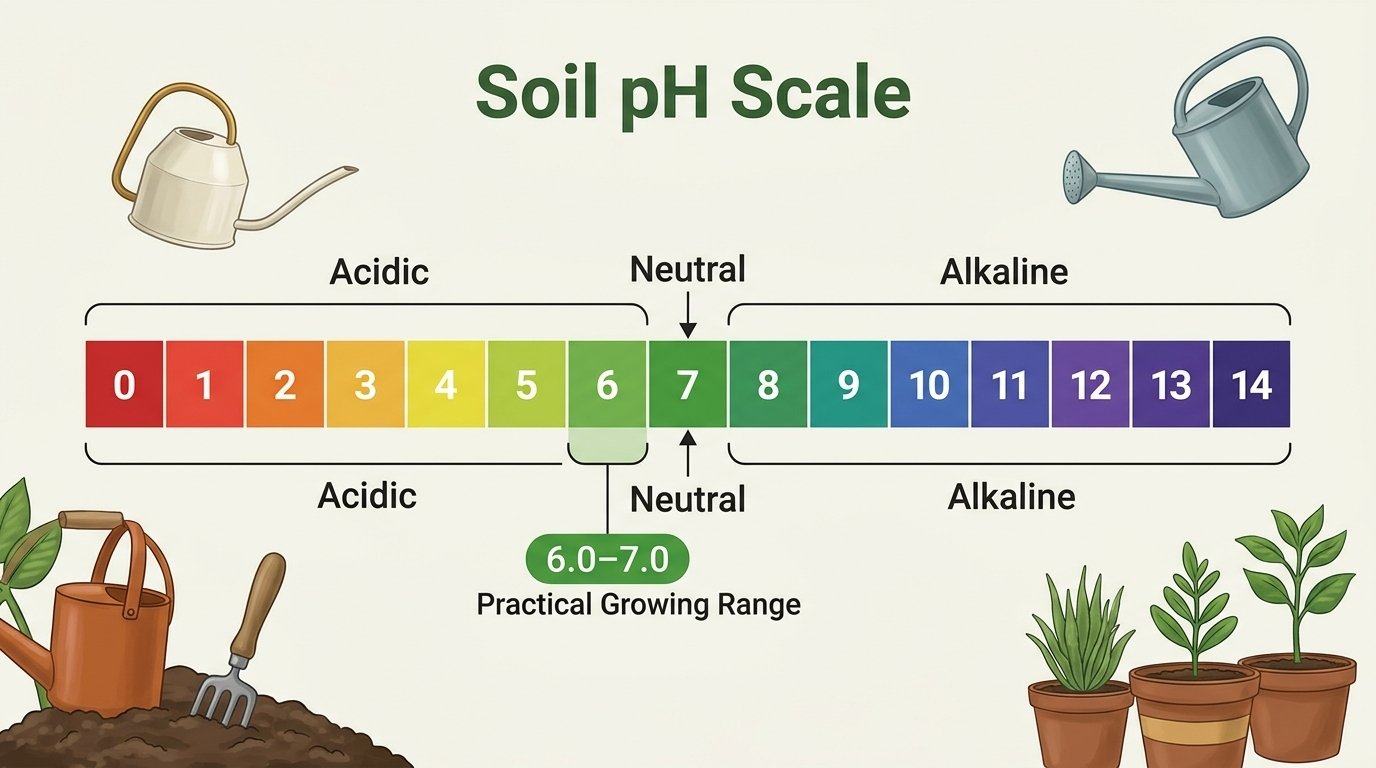
According to Cornell Cooperative Extension, the ideal pH for nutrient availability in most crops falls between about 6.2 and 7.2. Penn State Extension gives a slightly narrower target of 6.2 to 6.8 for most garden plants. The small gap between these figures isn't a contradiction it simply reflects that "ideal" shifts a little depending on the crop. For practical purposes, aiming for a reading in the low-to-mid 6s puts you in a safe zone for the vast majority of greenhouse vegetables, herbs, and ornamentals.
Soil pH matters because it directly controls how well plant roots can absorb the nutrients already present in the soil. When pH drifts too far in either direction, nutrients become chemically locked up still in the soil, but unusable by the plant. This is especially relevant in a greenhouse setting, where soil often sits in raised beds or large containers with limited volume.
Because there's less total soil buffering the chemistry, repeated fertilizing, frequent irrigation, and the concentrated growing conditions typical of a greenhouse can shift pH more quickly than it would in an open garden bed exposed to natural rainfall and a much larger volume of surrounding earth.
Why Your Soil Sample Matters More Than the Test Itself
Before covering how to test soil pH step by step, it's worth addressing something most guides skip: a perfectly accurate test performed on a poorly collected sample still gives you a wrong answer.
Soil pH can vary meaningfully across a greenhouse bench or bed, especially if you've amended different sections at different times, used different potting mixes in different containers, or applied fertilizer unevenly. Scooping a single handful of soil from one spot and assuming it represents your entire growing area is one of the most common mistakes greenhouse growers make, and it's an easy one to avoid.
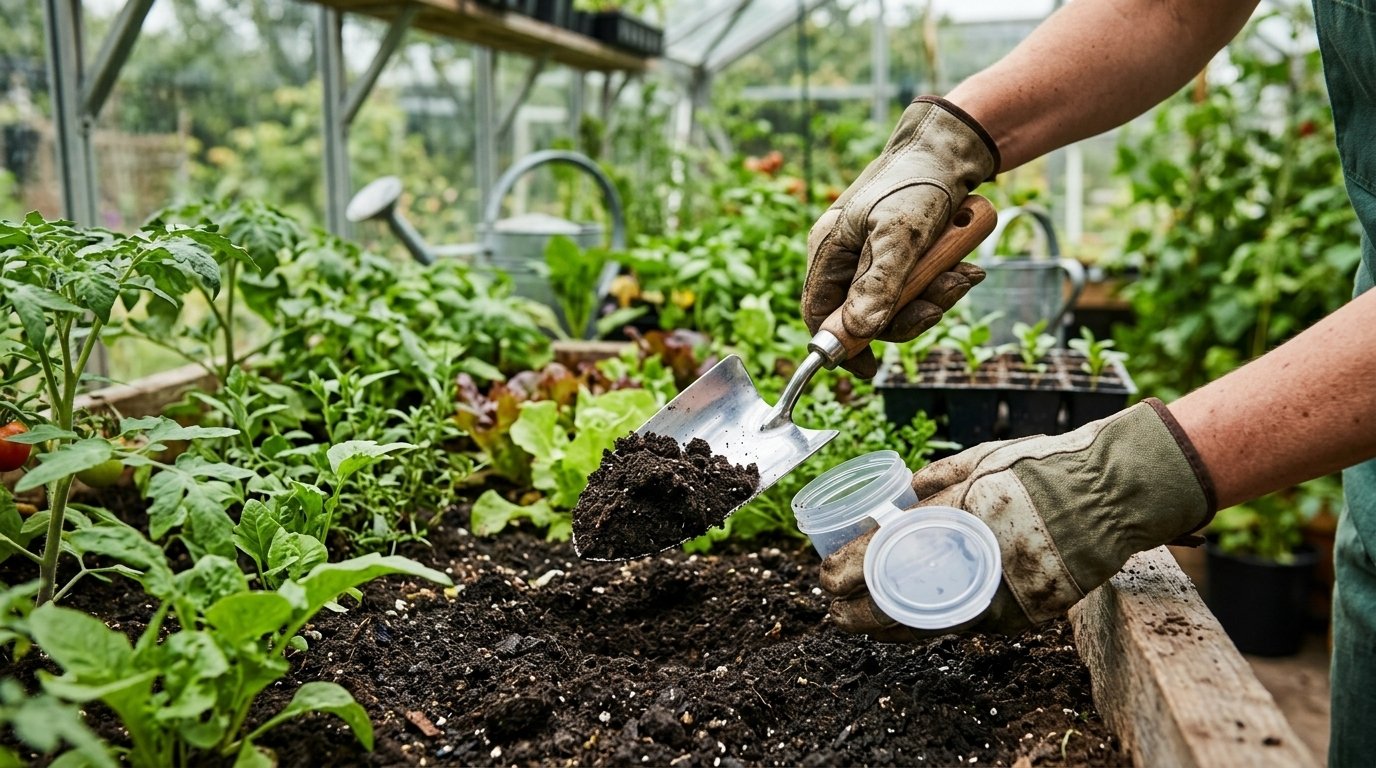
How to Collect a Reliable Soil Sample in a Greenhouse Setting
1. Treat each bed or container group as its own zone. If you have multiple raised beds, in-ground rows, or groups of containers using different soil or potting mixes, sample each one separately rather than combining them.
2. Dig to the right depth. For garden-style greenhouse beds, sample the top 6 inches, where most root activity and nutrient exchange takes place. For containers, sample from the same relative depth across several pots of the same mix.
3. Take multiple samples per zone. A small raised bed typically needs 4–5 sampling points combined into one sample; a larger in-ground greenhouse bed may need up to 10–15. Combine the soil from these points into a single, clean container.
4. Mix everything into one composite sample. Break up clumps, remove roots and debris, and stir thoroughly so the combined soil is uniform. This blended composite, not any single scoop, is what you actually test.
5. Avoid sampling right after fertilizing or amending. If you've recently applied lime, sulfur, or a fresh dose of fertilizer, wait before testing. Greenhouse soils and potting mixes react to amendments fairly quickly given their smaller volume, but testing too soon can still give you a reading that doesn't reflect where the soil will actually settle.
Soil Sampling Checklist
A clean trowel or small soil probe.
A clean plastic container or bucket (avoid metal, which can affect chemical test results).
Distilled or deionized water, if your chosen method requires it.
A notebook or phone to record which bed or container group each sample came from.
How to Test Soil pH: The Full Range of Methods
There isn't one single correct way to test soil pH there's a range of methods, and the right choice depends on how precise you need to be and how much you're willing to spend. This matters more in a greenhouse than it might in a backyard garden, because greenhouse growers are often managing multiple beds or crop cycles and may need to test more frequently.
Method 1: Vinegar and Baking Soda (Free, Rough Estimate Only)
This is the simplest way to get a general sense of whether your soil leans acidic or alkaline, using items you likely already have on hand.
1. Put a spoonful of soil from your composite sample into a container.
2. Add a splash of white vinegar. If it fizzes or bubbles, your soil is likely alkaline.
3. If nothing happens, take a second spoonful of soil in a new container, mix in a little water to form a muddy paste, then add a spoonful of baking soda. If it fizzes this time, your soil is likely acidic.
4. If neither test produces a reaction, your soil is probably close to neutral.
This method only tells you which direction your soil leans. It does not produce a specific pH number, and it shouldn't be the basis for deciding how much lime or sulfur to apply to a greenhouse bed.
Method 2: Red Cabbage Juice Indicator (Low Cost, More Precise Than Vinegar)
Red cabbage contains a natural pH-sensitive pigment that changes color depending on acidity or alkalinity, giving a more graduated reading than the vinegar test.
1. Blend a couple of red cabbage leaves with water and strain the liquid through a coffee filter to remove solids.
2. Add a spoonful of soil to a small jar, then add enough cabbage juice to cover it.
3. Shake gently, let it settle, and compare the liquid's color to a standard cabbage-juice pH color chart, widely available online.
Reds and pinks indicate more acidic soil, blues and greens indicate more alkaline soil, and purple sits closer to neutral. It's still an estimate, but a more detailed one than the vinegar test.
Method 3: pH Test Strips (Inexpensive, Widely Available)
Test strips are treated with pH-sensitive dye and change color when exposed to a soil-and-water mixture, similar to how pool test strips work. They're inexpensive and easy to find at garden centers, but they come with a real limitation: most soil pH test strips only resolve to about half a pH unit at best. Because soil itself is dark, it can stain the strip and make an exact color match somewhat subjective from person to person.
Method 4: Chemical Test Kits (Moderate Cost, Moderate Precision)
These kits include reagents that react with a soil-and-water mixture to produce a color change, which you then compare against an included chart. They're a step up from test strips in terms of structure, but they share the same core weakness: color interpretation is still somewhat subjective, and most kits include enough reagent for only a handful of tests, which can add up if you're testing several greenhouse beds regularly.
Method 5: Digital pH Meters (Best Balance of Cost and Accuracy for Regular Greenhouse Use)
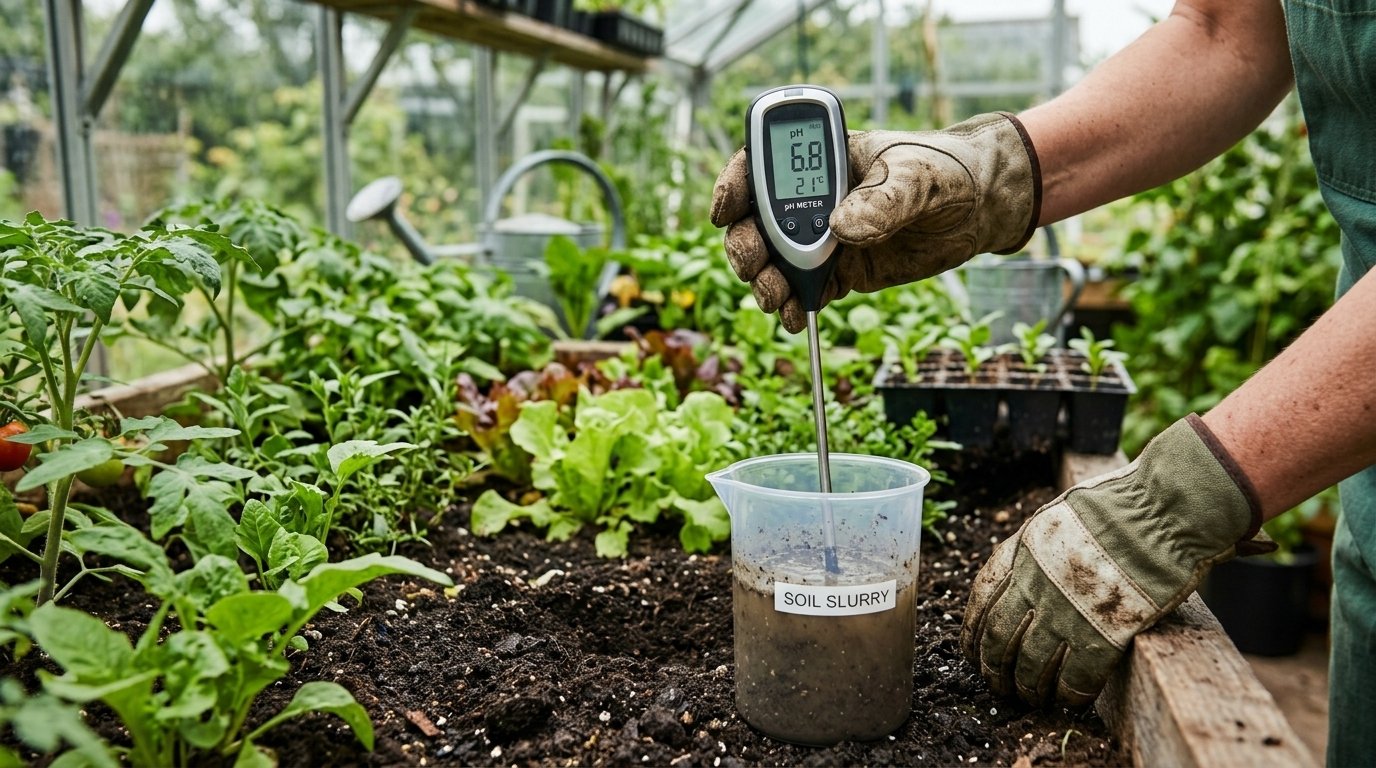
A digital pH meter uses an electronic probe to measure pH directly, removing the guesswork of color interpretation. Higher-quality digital soil pH meters can read to within a tenth of a pH unit, though budget stick-probe meters sold at garden centers are often far less accurate and should be checked against a known reference solution before you trust their readings.
How to use one (slurry method):
1.Mix your composite soil sample with distilled water in a 1:1 ratio by weight for example, 25 grams of soil with 25 milliliters of water.
2.Stir for a few seconds, then let the mixture settle for about 15 minutes.
3.Stir briefly again, then insert the meter's probe and wait for the reading to stabilize before recording it.
Digital meters need basic upkeep periodic calibration against pH buffer solutions and proper cleaning and storage of the probe to stay accurate over time. For growers managing multiple greenhouse zones throughout the season, this small maintenance routine pays for itself in reliable readings.
Method 6: Professional Lab Testing (Highest Accuracy, Small Cost)
For anything with real stakes establishing a new greenhouse bed, managing soil across multiple growing seasons, or troubleshooting a persistent problem that hasn't responded to normal care sending a sample to a soil testing lab is worth the modest cost.
University Cooperative Extension offices across the United States offer affordable soil testing services, often for just a few dollars, and typically return results along with specific lime or fertilizer recommendations within one to two weeks. Because each state runs its own Extension system, the most reliable way to find yours is to search for "[your state] Cooperative Extension soil test" or contact your county's Extension office directly.
Lab testing also catches things home methods can't, such as measuring free calcium carbonate content, which affects exactly how much lime your soil needs to shift its pH.
Comparing Every Testing Method Side by Side
What Your Soil pH Result Actually Means
Once you have a number, here's how to interpret it and decide what, if anything, to do next.
Pro Tip: If a greenhouse bed tests below pH 5.0 or above pH 8.0, run a follow-up test before applying a large amount of lime or sulfur. Extreme readings are sometimes caused by sampling error rather than the soil's true condition, and amending based on a mistaken reading can do more harm than good in the confined volume of a raised bed or container.
Common Mistake: Testing soil within about three months of adding lime, fertilizer, or a large amount of compost. In greenhouse soil especially, amendments take time to fully react, and testing too soon can give a reading that doesn't reflect where the soil will actually settle.
How Often You Should Retest Greenhouse Soil
Under normal conditions, soil pH doesn't shift quickly, so constant testing isn't necessary. Cornell Cooperative Extension recommends retesting garden soil every 2 to 3 years for most crops, while Penn State Extension suggests every 3 to 5 years is generally sufficient for typical home gardening. Greenhouse growers who fertilize heavily, irrigate frequently, or run multiple crop cycles through the same bed each year should lean toward the shorter end of that range, since intensive greenhouse management tends to shift soil chemistry faster than a once-a-season outdoor garden.
The best times to test are at the start of a new growing cycle or during a seasonal changeover between crops. Testing at these points gives you results, and any recommended amendments, early enough to apply lime or sulfur before your next planting, since both amendments need weeks to months to fully take effect.
Frequently Asked Questions About Testing Soil pH
How do I test soil pH in a greenhouse without buying anything?
Use the vinegar and baking soda method described above. It won't give you a precise number, but it will tell you whether your soil leans acidic, alkaline, or close to neutral, using items most households already have.
Is the vinegar and baking soda test actually accurate?
Not precisely. It only indicates a general direction acidic, alkaline, or neutral rather than a specific pH value. Treat it as a starting point, not a basis for deciding how much lime or sulfur to apply.
How deep should I dig for a soil sample in a raised bed?
Sample the top 6 inches, where most plant roots and nutrient activity are concentrated. For containers, sample from a similar relative depth so your readings are comparable across pots.
How many samples do I need from a single greenhouse bed?
A small raised bed typically needs 4–5 sampling points combined into one composite sample. Larger in-ground beds may need up to 10–15 points to represent the space accurately.
How often should I test my greenhouse soil's pH?
Roughly every 2 to 5 years for stable beds, but more often if you're running multiple crop cycles per year or fertilizing heavily, since intensive use can shift pH faster than typical outdoor gardening.
Should I send my soil to a lab instead of testing at home?
For routine checks, a home method is usually sufficient. For a new greenhouse bed, a significant crop investment, or a bed that's underperformed despite good care, a lab test through your local Cooperative Extension office is worth the small cost and gives you specific amendment recommendations.
Does greenhouse irrigation water affect my soil pH test?
Very wet or waterlogged soil can affect the accuracy of some methods, particularly slurry-based digital meter readings. Test soil that's moist but not saturated, and be aware that consistently alkaline or acidic irrigation water can gradually shift your soil's baseline pH over time.
Can I test potting mix the same way as garden soil?
The same basic methods work, but potting mixes are often formulated differently than native soil and can have different starting pH levels, so don't assume the same benchmarks apply as strictly as they would in an in-ground bed.
Putting It All Together
Knowing how to test soil pH properly doesn't require expensive equipment or specialized training it requires a properly collected sample and a method that matches how precise you actually need to be. For a quick gut check, the vinegar and baking soda test costs nothing. For regular greenhouse management across multiple beds, a digital pH meter offers a reliable number without much expense. And for anything with real stakes, a Cooperative Extension lab test remains the most accurate option available.
Whatever method you choose, the sample matters just as much as the test itself. Take the time to sample each bed or container group properly, mix your composite sample well, and test at the start of each new growing cycle. You'll have a number you can trust, and a clear sense of whether your greenhouse soil needs any adjustment before your next planting.
For a broader look at managing nutrients, drainage, and soil health across your entire growing space, see our Greenhouse Soil & Fertility guide.